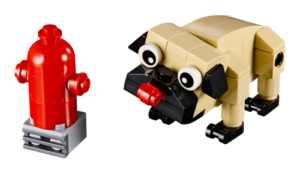
LEGO Pug Building: A Witty Guide for Builders of All Breeds
Welcome to the World of LEGO Pugs
Constructing a LEGO pug is not a task—it’s an entire mission of cuteness. Consider it dog ownership minus the mess. A combination of imagination, engineering, and flat-out stubbornness (in the same vein as a real pug), this task is ideal for anyone who prefers their pets in pixel and their obstacles in brick form.
Before you plunge in snout-first, here’s what you’ll need:
- Bricks Galore: Gather a LEGO rainbow of whites, tans, and blacks—essentially a pug’s wardrobe.
- Work Zone: Locate a level work surface. The dinner table works great until dinnertime—then it’s the survival of the fittest (bricks and all).
- Instructions: Yes, one of those special occasions when reading the manual is hip.
- Brick Separator: Seriously, this tool is the MVP of the entire endeavor.
Now you’re ready to build a dog that never sheds.
Pug Parts: The Bricks You’ll Need
Before you tap into your inner LEGO whisperer, stock up on:
- Wee bricks. Lots of wee bricks. You’ll find yourself dreaming about 1x1s.
- Special pieces for those puggy details: the button nose, the smooshed ears, and the perpetually surprised eyeballs.
- A brick separator—because accidents do happen, and LEGO doesn’t take kindly to them.
Set everything out like you’re preparing for a NASA launch. Because once you begin, there’s no coming back.
How Not to Lose Your Mind with Instructions
LEGO instructions are similar to IKEA instructions—except instead of furniture, you’re creating a small, plastic dog friend.
Here’s how to keep your mind intact:
- Zoom In: Inspect closely. One misplaced brick and your pug will be half-chihuahua.
- Orientation Is Important: Turn that brick incorrectly and now your pug’s eye is on his belly.
- Sort It Out: Literally. Organize pieces by shape, size, and frequency of loss.
- Go Layer by Layer: As in lasagna. But with bricks.
- Click It Good: A loose part today is a lost limb tomorrow.
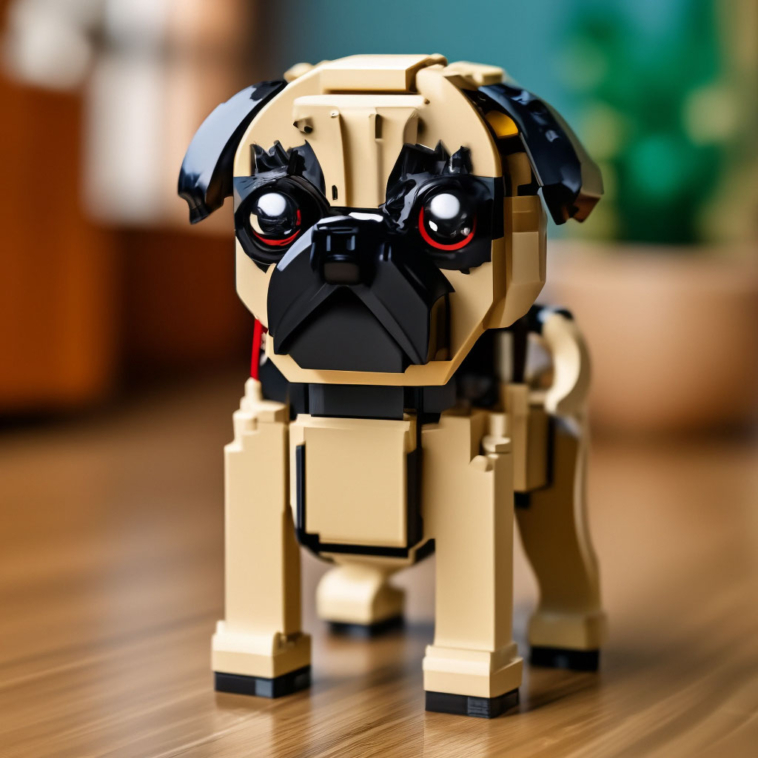
Step 1: Assemble the Pug’s Head (a.k.a. The Mug of the Pug)
Grab those tiny pieces and begin crafting a face so cute it could start a TikTok account.
You’ll need:
- Tiny black and white round pieces for those big cartoonish eyes.
- Tan bricks for the signature squashed pug head.
- A few well-placed black bits to suggest a nose without actually giving it sniffing power.
Pro tip: symmetry is key. Otherwise, your pug will look like it’s mid-sneeze forever.
Step 2: Building the Body (a.k.a. the Loaf)
Now for the body—a short bread loaf with legs basically.
Instructions:
- Stack bricks medium-sized for structure (this pug’s been having a good appetite).
- Construct the belly. No six-packs here.
- Tilt smooth the back with tiles—this dog’s polished looking.
- Construct legs and affix them like you mean it.
The body should be yelling “chunky elegance.” Think: elegant potato.
Step 3: Crafting the Legs (Stubby Yet Sturdy)
Let’s get those four teeny nubs functional.
Pick up your:
- 1x2s, 1x1s, and plates—pug-sized paws alert.
- Do the formula four times. And, yes, all the legs should be the same. This isn’t a work of abstract art.
Snap on with accuracy. Wobbly-legged pug just waiting to tip over at the first breeze—or gentle desk vibration.
Step 4: Tail and Touch-ups (aka Final Flourishes)
Your pug is now a tail and a few charming details away from greatness.
- Use a curved piece for the signature curly tail. If it looks like a cinnamon roll, you’re doing it right.
- Add ears, nose, and do a once-over to check for anything missing or. weird.
- Give it a name. Pugs need names. Maybe Sir Bricks-a-Lot?
Congratulations—you now have a LEGO pug that looks just as confused as the real thing.
Best Practices: AKA How to Avoid a Plastic Meltdown
- Sort Bricks: Dumping them in a heap is enjoyable until you waste 30 minutes searching for one piece the size of a crumb.
- Read Every Step: Freelance building is not what you want to be doing here.
- Use a Clean Space: If you like walking on LEGO at 2 a.m.
- Work on a Solid Surface: Beds don’t qualify. Neither do carpets.
- Take Breaks: Gazing at a small brick pile too long could lead to existential horror.
- Snug Fits Only: Loose bricks = sad pugs.
Displaying Your LEGO Pug: Because It Deserves the Spotlight
You’ve built it. Now flaunt it.
- Put It on a Shelf: Right next to your books so people know you’re both fun and literate.
- Glass Case Display: Because your LEGO pug deserves museum treatment.
- Photoshoot Time: Capture it from all angles—especially that proud head tilt.
Add some LED lighting and maybe a mini sign that says “DO NOT PET (made of plastic).”
Avoiding Classic Pug Pitfalls (LEGO Edition)
- Misplaced Bricks: Your pug suddenly has a third eye.
- Step Skipping: No trust fall—stay on schedule.
- Brick Hulk-Smashing: Press down softly unless you’d like a stack of regret.
- Tiny Brick Blindness: They’re ridiculously easy to overlook. So easy. So very, very easy.
When in doubt, refer back and check again. Or blame the instructions. (We won’t tell.)
Customize Your Pug Because… Why Not?
Punk rock pug? Do it.
Disco pug? Go for it.
Here’s how:
- Change Colors: Black pug? Fawn pug? Pink-and-green party pug? Live your truth.
- Accessorize: LEGO collar. Perhaps a gold chain if your pug’s a baller.
- Change the Pose: Sitting? Standing? High-fiving a LEGO cat? Totally doable.
- Build a Backdrop: Dog park, tiny house, medieval castle—pugs go with everything.
Final Barks—Er, Words
Building a LEGO pug is more than just snapping bricks together—it’s a journey of patience, misplaced parts, and eventually, joy. You’ll gain building skills, design chops, and a new appreciation for how many shades of tan exist.
What You’ll Walk Away With:
- A finished pug that’s 100% housebroken.
- Better spatial awareness than ever before.
- Possibly a new obsession.